Building a Stronger Opel Blitz Radio Truck
Over the years I have built quite a few of these for my customers. I have found that while this is a very nice kit it is very fragile and will break if you assemble it using the parts provided with the kit.
In this article I am going to focus on the antenna assembly. The wheels and cab are pretty straight forward and there is really nothing on that I can say that is not common sense.
So let's get started. First of go and get yourself a drill bit and a piece of brass rod that is roughly the same diameter of the antenna support struts that are provided with the kit.
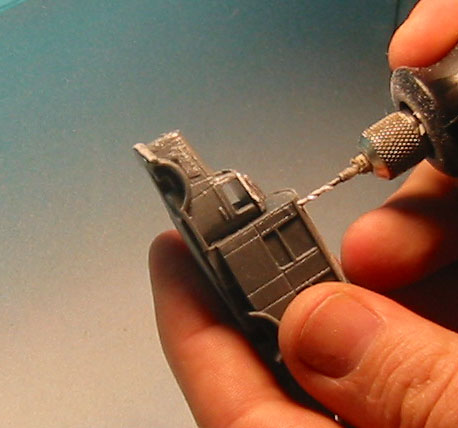
Now using that drill bit in a pin vise or a slow speed drill, drill into the four holes that are in the top of the truck. Feel free to go as deep as you like but make sure to go in at least a quarter of an inch.
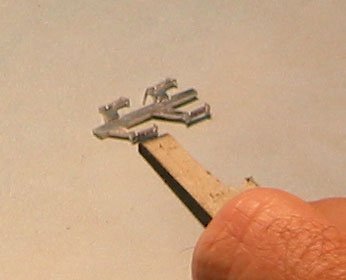
In this picture I cut a piece of wood so the width of it is a little bigger than the length of the antenna strut.
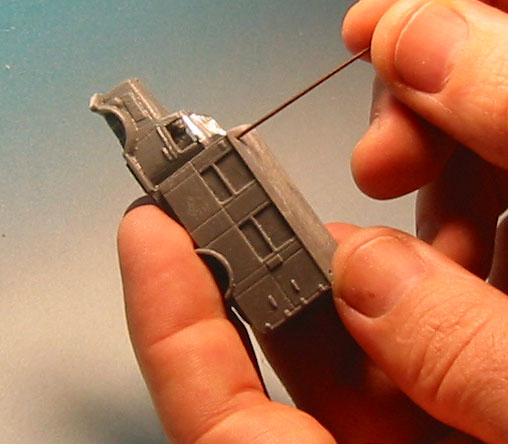
Now that I have my cut template made and my holes are drilled out, I put in the brass rod. Just put a little bit of super glue on the tip a shove it in there.
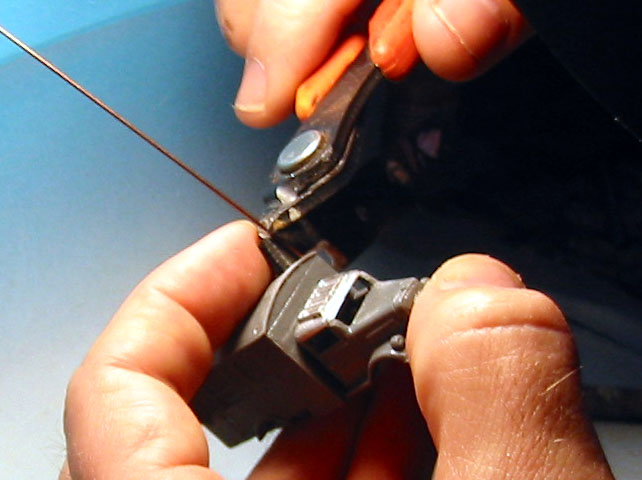
Now you take that cut template an cut down the rod. Do this on the other struts.
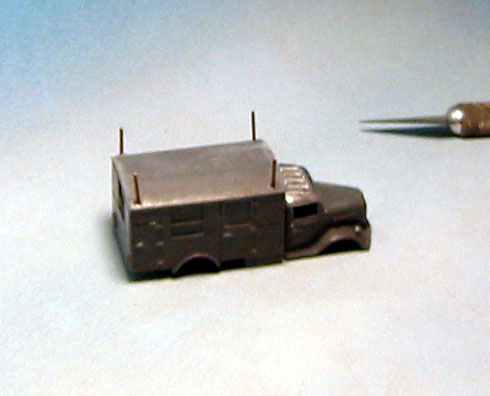
Here is what it should look like when you have done this.
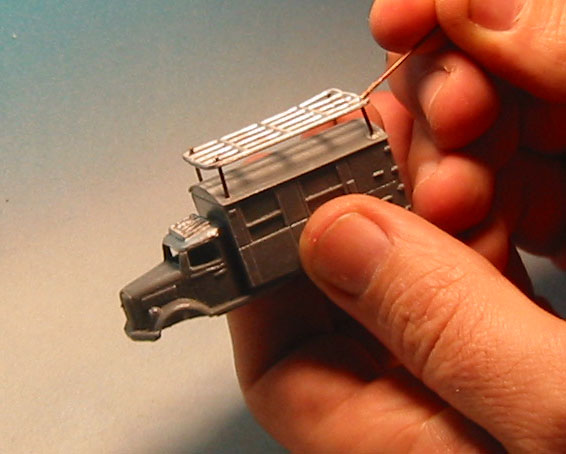
Now that you have the struts installed, it is time to work on the antenna. Make sure that you have cleaned up the antenna and it is as flat as possible. Take the antenna and put it on the struts so that the struts are on the inside corners. You might have to do a little bending to get it on but not much if you did the previous steps right. Adjust the antenna so that it is flush with the top of the struts. Put a little drop of super clue and put it in the joint. Use a little sand paper to debur if it is needed.
Finish up the additional assembly and paint.
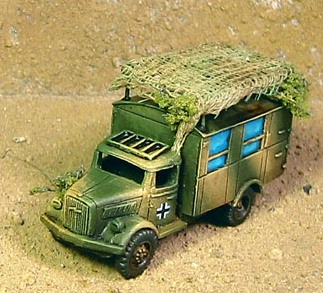
Here is a completed radio truck.

Over the years I have built quite a few of these for my customers. I have found that while this is a very nice kit it is very fragile and will break if you assemble it using the parts provided with the kit.
In this article I am going to focus on the antenna assembly. The wheels and cab are pretty straight forward and there is really nothing on that I can say that is not common sense.
So let's get started. First of go and get yourself a drill bit and a piece of brass rod that is roughly the same diameter of the antenna support struts that are provided with the kit.
Now using that drill bit in a pin vise or a slow speed drill, drill into the four holes that are in the top of the truck. Feel free to go as deep as you like but make sure to go in at least a quarter of an inch.

In this picture I cut a piece of wood so the width of it is a little bigger than the length of the antenna strut.

Now that I have my cut template made and my holes are drilled out, I put in the brass rod. Just put a little bit of super glue on the tip a shove it in there.

Now you take that cut template an cut down the rod. Do this on the other struts.

Here is what it should look like when you have done this.

Now that you have the struts installed, it is time to work on the antenna. Make sure that you have cleaned up the antenna and it is as flat as possible. Take the antenna and put it on the struts so that the struts are on the inside corners. You might have to do a little bending to get it on but not much if you did the previous steps right. Adjust the antenna so that it is flush with the top of the struts. Put a little drop of super clue and put it in the joint. Use a little sand paper to debur if it is needed.
Finish up the additional assembly and paint.

Here is a completed radio truck.


If you found this useful and would like to see more article like this click the button below and make a donation.
All text and images here are copyright Jeff Hiatt 2008