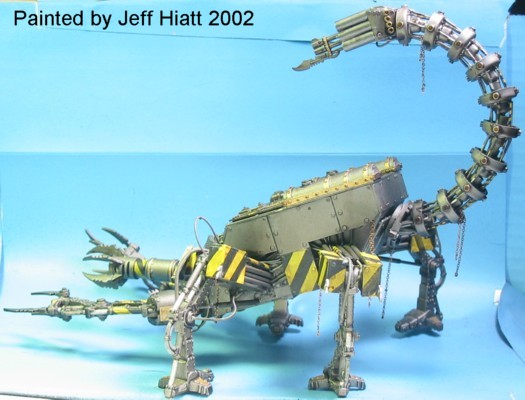
The is a reprint of an article that I wrote back in 2002
The first day was spent mostly fleshing out the basic shape of the Defiler. The base frame came from an old Rhino. The weight bearing structural parts (the legs and arms) were drilled to accommodate a rod that went into the frame. When I got the pose I was looking for, I tacked the rods into position and poured resin into the hull to reinforce every thing.
One of my goals here was to make this model as strong as possible so it could withstand the rigors of gaming.
Also, something to note right about here is that for the legs and the arms I used legs from old sentinels for both types of appendages.
One thing to note about positioning of the legs is with something like this you want to make sure that everything is flat. Well, if you look at this picture you will notice that it doesn't look that way on this model. When I was setting the legs in position, I made sure that I did this on a piece of glass. I can't say too much about having a glass surface to work on. A caution about it though make sure it is a spare piece of glass and not a piece from the good furniture.
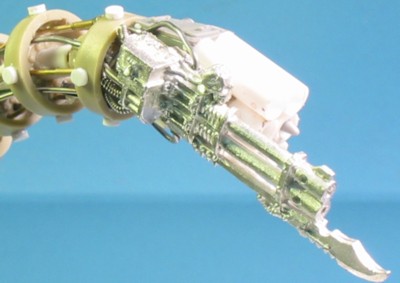
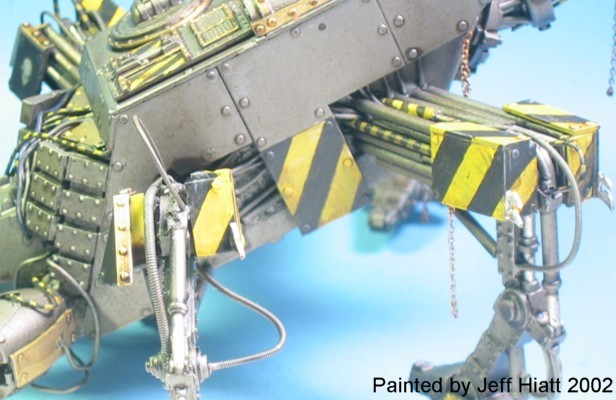
Here we get to some of the detail in the legs. The "bone" of the leg was made from a plastic "I" beam. With the pistons I used a lot of aluminum, brass, and plastic rod. I wanted to have a lot of them. What I wanted to go for here was the out of control, way too much chaotic look. All that was needed after the pistons were some hoses and tubes and away we go.
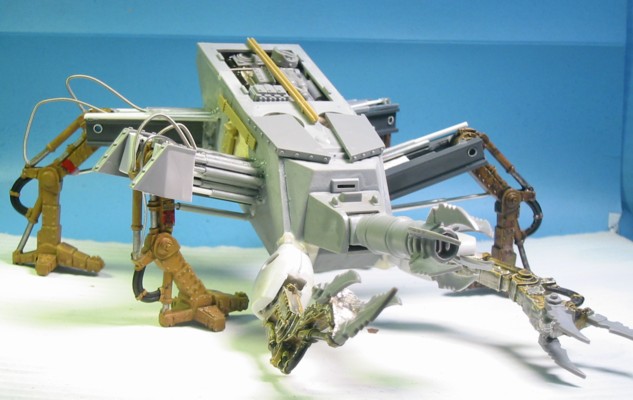
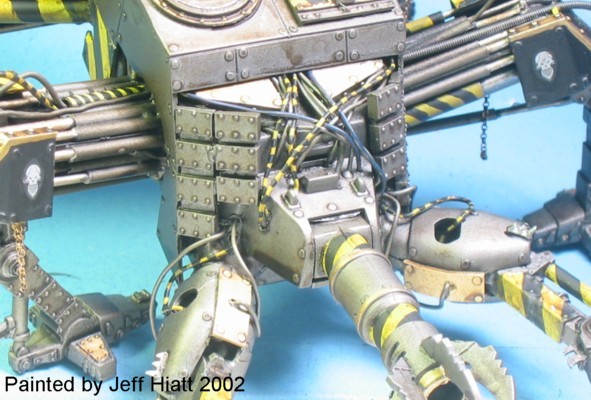
Looking inside the top rear deck of this you get a great example of "Creative Gizmology". At this point it looks like a bunch of random bits but when everything is put together and painted it should look like and engine or something else mechanical
To start, I finished off the leg pistons and tubes that I started yesterday
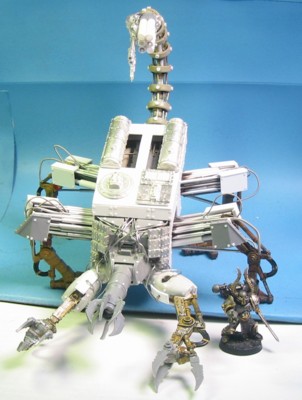
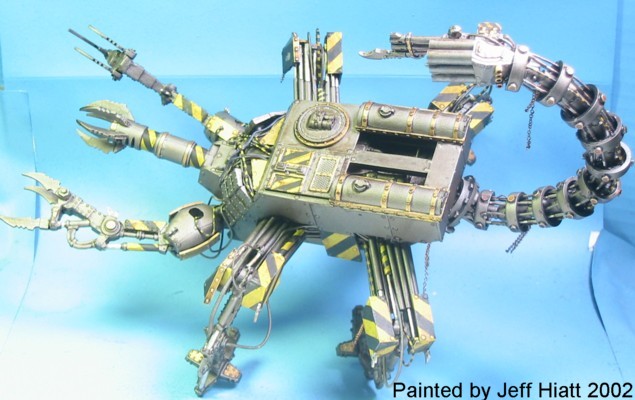
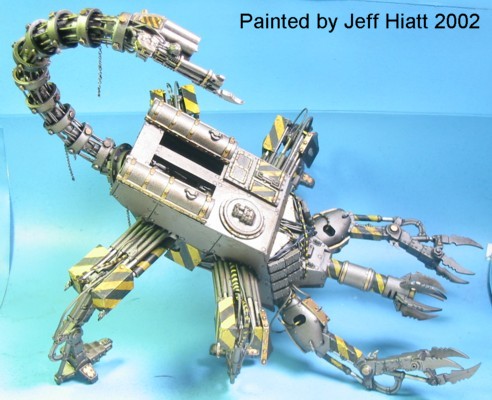
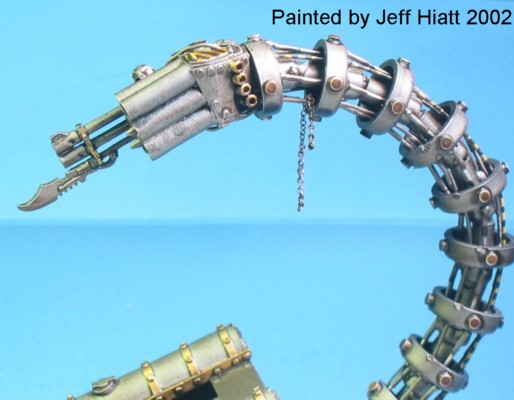
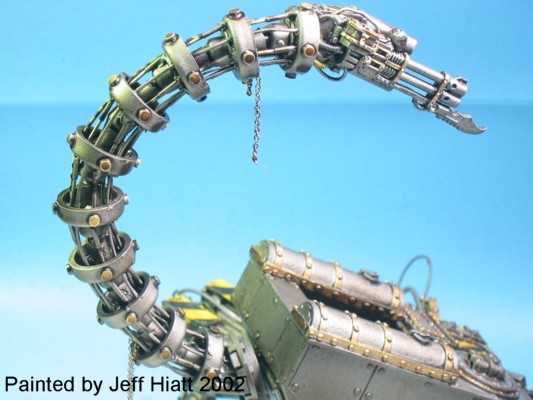
Also you might notice that another appendage has appeared on the rear. After looking at this last night I decided that it was starting to look somewhat scorpion like so thus the tail.
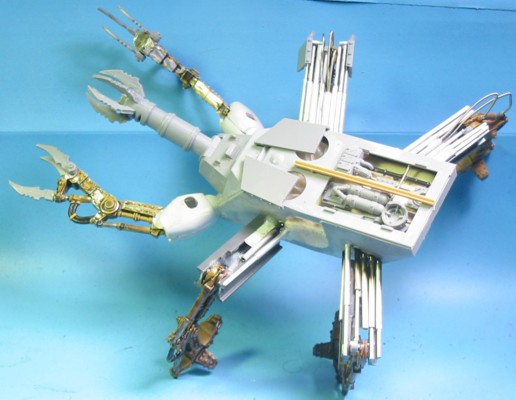
The tail started it's life as a 1 foot long piece of 1/8 in brass rod. Once I got the rod bent to the right position I threaded the vertebra (large circular portion) on it. For the larger circular portions of the tail I used a 1/35 scale tank wheel and then I inserted a plastic tube into it. On the inside portion of the vertebra I drilled four equidistant holes, these are for the pistons.
Starting from the top I inserted the male portion of the piston through the lower vertebra hole. When it had been inserted through there the female portion of it was waiting for it, held with tweeze. The male portion is inserted in it and that side is glued into place on the higher vertebra and the excess portion is trimmed from the lower.
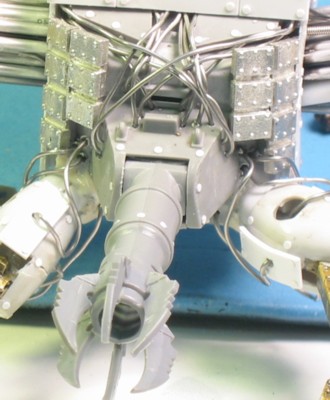
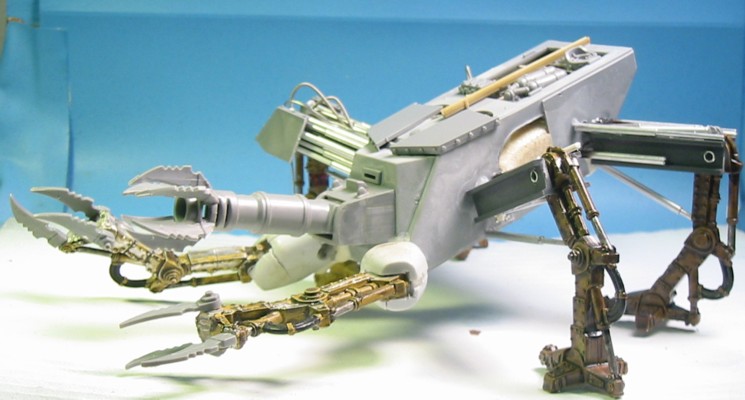
Here there are two more thing that are worth noting. One being the amount plating and the other being the further use of creative gizmology on the joints of the leg to the hull.
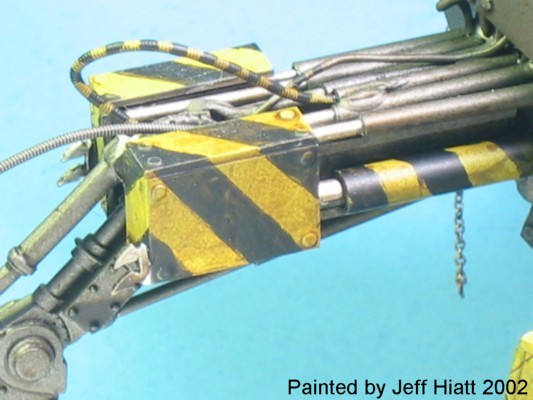
For the armor plating I started with Plastistuct 1/4in. sidewalk tile. I broke myself off a rectangular piece of the approximate size of the armor plate. From there I trimmed it down to the right size. After this was done I cut the piece where I thought the plate joints would be. I beveled the edges and then I reassembled the. At this point I have an armor plate with panel lines. Now using my trusty Waldron punch set I get started with punching the hundred of tiny rivets that will go on to this tank. These rivets are applied to strategic portion of the armor plating.
On the hull where the armor plating will be mounted I attached four stand offs for the armor to attach to. At this point I started to apply random bits of wire, electric guitar string and what ever else I could find to the under hull. After the under hull had enough bits applied to it I then applied the plating.
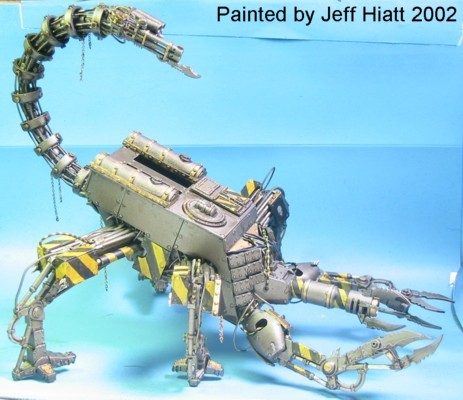
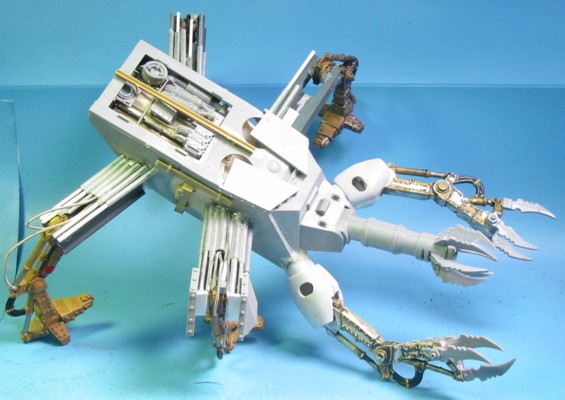
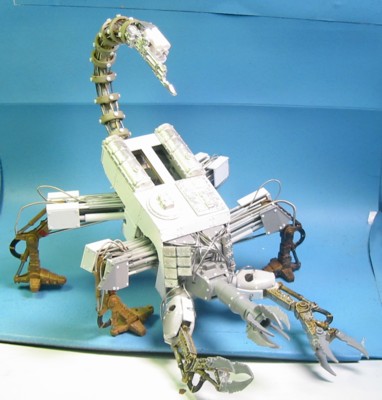
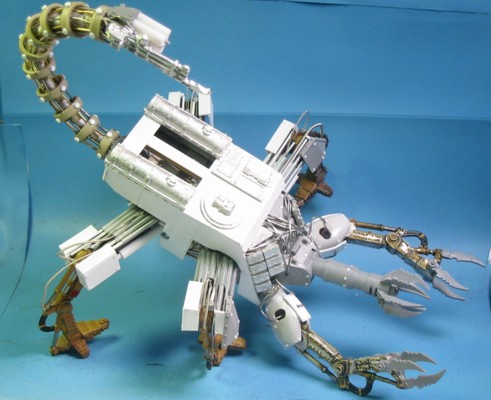
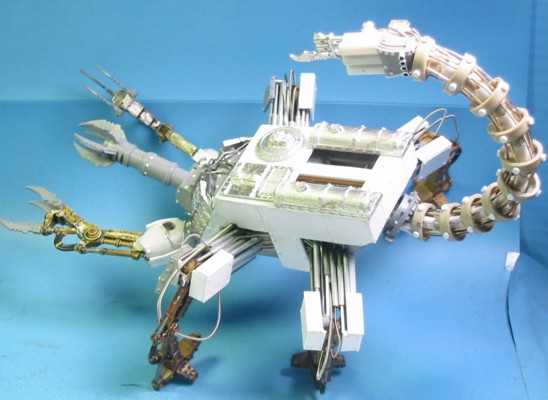
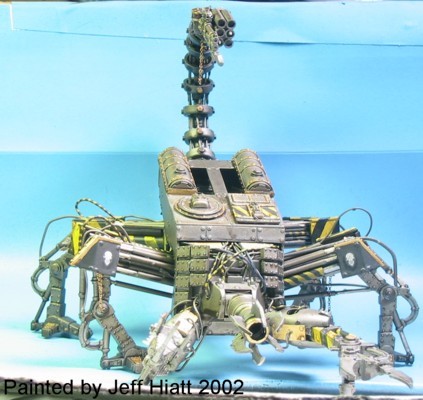
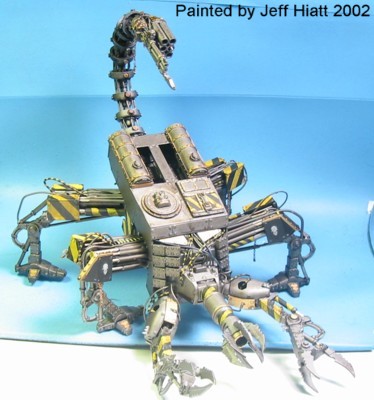
Here are some pictures of the finished piece: